Translate using the Translate & Adapt app
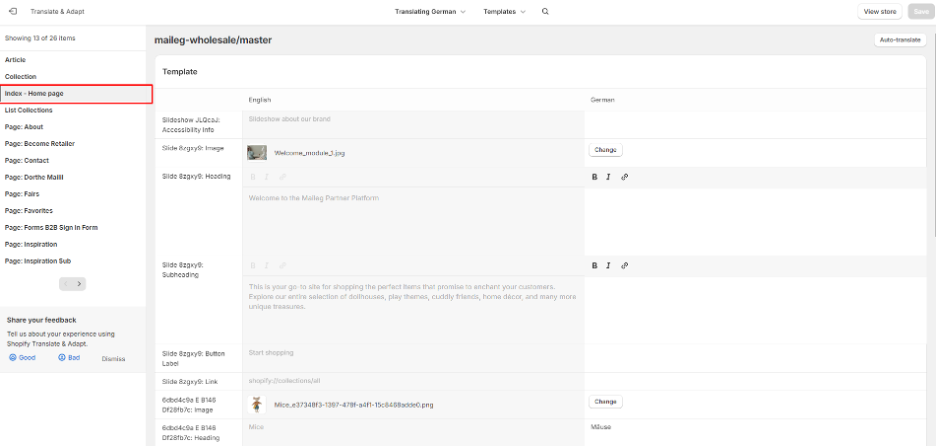
1. Homepage
Translate & Adapt → Templates → Index – Homepage.
2. Product Page
Translate & Adapt → Products
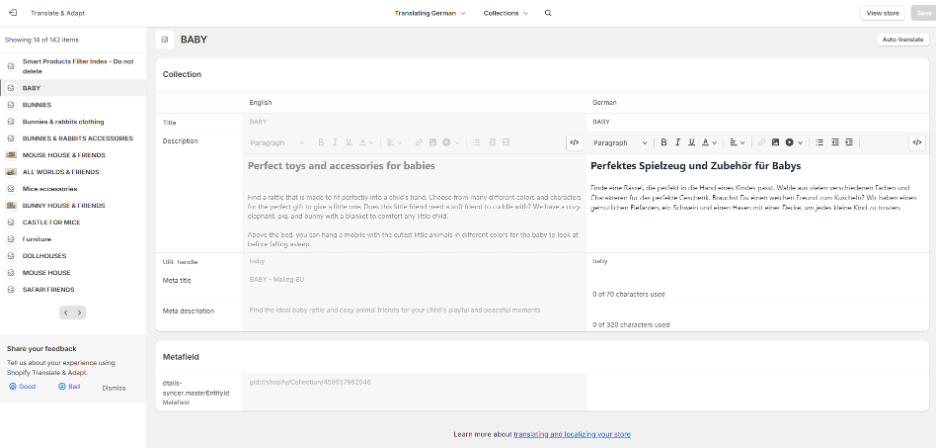
3. Collection Page
Translate & Adapt → Collection
4. Page Template
Translate & Adapt → Templates
Here, you can adjust the translation for each page. All adjustments are only applied to that page.
5. Specific Page
Translate & Adapt→ Pages
Here, you will find all the pages you have created in admin → online store → pages. Find and translate the pages you want.
6. Header & Footer
a. Header Announcement Bar
Translate & Adapt → Section groups → Header Group
b. Header Main-Menu
The Main Menu is created by the Globo Mega Menu app. You can adjust the Main-menu translation with this app.
Globo Mega Menu → Translation
c. Header Logo
Translate & Adapt → Theme settings → Logo
d. Footer Title
Translate & Adapt → Section groups → Footer Group
e. Footer Menu
Step 1: Create a Footer Menu in each Language.
Admin → Online Store → Navigation
Step 2: Add the Footer Menu corresponding to each Language.
Online Store → Themes → Customize → Footer
f. Newsletters Footer
The newsletter footer is translated by using code.
Online Store → Themes → … icon (next to the Customize button) → Edit code → footer.liquid (section) → search (Ctrl + F) footer-block__newsletter
Next, find the language iso_code here and add it following the example below.
Example: You want to translate the newsletter footer into Afrikaans.
You will find its launguage iso_code is af.
{% case %}
{% when “af” %}
<– Klaviyo embed code here ->
{% endcase %}
Remember to put it in the {% case %}{% endcase %}
Translate using code[1]
Use case: beyond the functionality of the Translate & Adapt app. Ex: message for Inactive/blocked customer
In addition to what is translated in the Translate & Adapt app, it is also translated by code, specifically in the Locales folder (edit code).
The locales folder will contain files in JSON format, and the file name will represent the iso_code of that language.
Example:
● en.default.json (en → English)
● da.json (da → Danish)
● de.json (de → German)
So if you want to add text for any language, select the file that corresponds to that language.
Example
“shopify”: {
“collections”: {
“read_more”: “Read More”,
“read_less”: “Read less”,
“buy_all”: “Buy All”
}
This is the structure of a JSON file.
In this example I want to get “read_more” from JSON.
It can be called by
{{ ‘shopify.collections.read_more’ | t }}
The code snippet {{ ‘shopify.collections.read_more’ | t }} is a piece of Liquid code in Shopify, used to display translated content. Here is detailed:
● {{ … }}: This is the Liquid syntax for outputting content. Anything within the two {} will be processed and the result will be displayed.
● ‘shopify.collections.read_more’: This is a text string, known as a translation key. Shopify uses this key to look up the corresponding content in the current language’s translation file.
● | t: This is a Liquid filter. The t filter translates a key into the corresponding text in the store’s current language.
● So, {{ ‘shopify.collections.read_more’ | t }} will look up the content corresponding to the key ‘shopify.collections.read_more’ in the current language’s translation file, and display that content. If no corresponding content is found, Shopify will display the key as the content.
Likewise, if you want to translate it into Danish. We will select the da.json file
Find the keyword shopify -> collections -> read_more. Add content for “read_more”.
In case there is no key shopify -> collections -> read_more, we will add a key with the same structure and content as the JSON example above.
Note: the keys must be the same for each file ‘shopify.collections.read_more’