Okta SOO for Acumatica
Administrator’s Guide
Create users in Okta
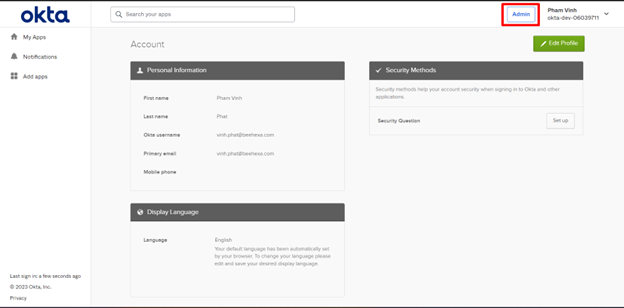
Step 1: Log in to your admin account.
Login to your admin account → Click the Admin button.
Step 2: Add user accounts
#Add manually
In the Admin Console, go to Directory → People.
Click Add Person.
3. Select a user type in the User type list or accept the default. See About custom user types in Universal Directory.
4. Complete these fields:
First name — Enter the user's first name.
Last name — Enter the user's last name.
Username — Enter the user's user name in email format.
Primary email — Enter the user's primary email if it's different from their username.
Secondary email — Optional. Enter a secondary email to allow the user to access information when their primary email is unavailable.
Groups — Optional. Enter the groups to which the user belongs.
Password — Select Set by user to allow the user to set their password, or select Set by admin and enter a password.
Send user activation now - Optional. This check box is available when Set by the user is selected as the password option. Select this check box to send a user activation email to the user.
User must change the password on first login — Optional. This check box is selected by default when you select Set by admin as the password option. Clear this check box if you do not want the user to change their password when they first sign in.
Now that user account will appear in the list of Person & username as below.
#Import users:
Follow this link for more detailed instructions.
5. Click Save or click Save and Add Another to add another user.
Create users in Acumatica
Step 1
Login to admin to create an account
1. Go to More Items → User Security
2. Click User.
Step 2: Recheck if the user account already exists.
Use the search feature by clicking magnifying glass icon and typing your username in the search box.
If that user account already exists, that account can use Okta SSO right after Okta SSO is enabled in your Acumatica system.
If that account does not exist, go to step 3.
Step 3: Add user accounts
1.Click the plus icon +.
2. Enter all necessary information.
Note: the email must be the one used to create the user account in Okta.
3. Add roles
4. Save


